Today we will learn how to enable google sign in feature in our flutter app using Firebase. So let’s do this steps by step:
Implement Google Sign-In
Step-1:
We need to create a Firebase project. We can create this from https://console.firebase.google.com/
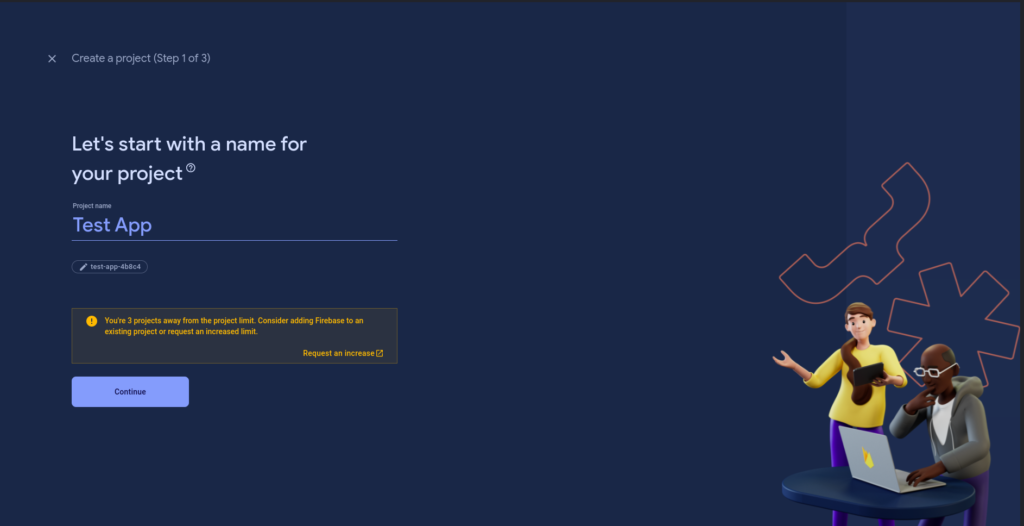
Type your project name. Then click continue and follow the steps.
After successfully project creation we need to connect our app with Firebase Console. For this we can click the “Add app” button & then select Flutter.
Once selected Flutter we will see a page as like this:
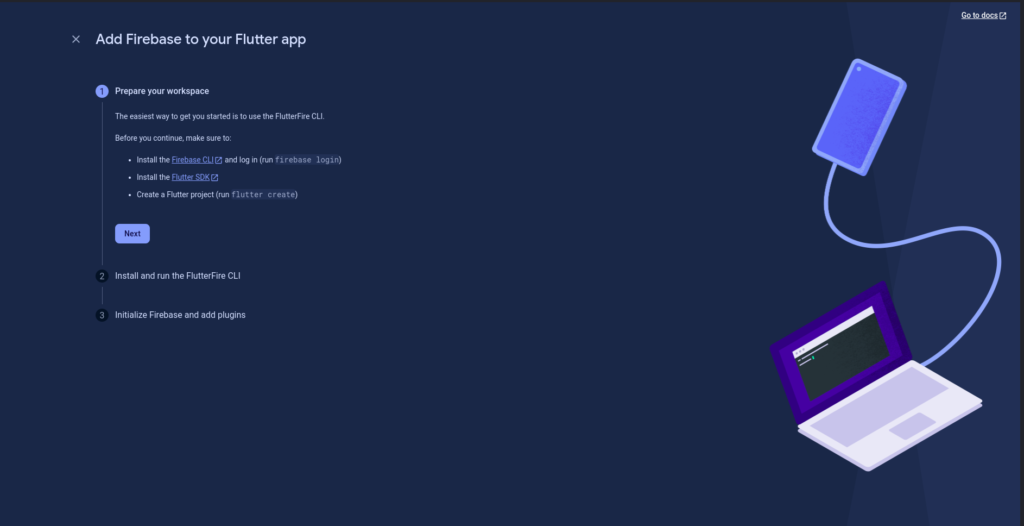
Now you need to setup Firebase CLI first. For setup Firebase CLI, you need NodeJS & NPM (Node Package Manager) installed in your machine. Once you done the Node installation process, you can click “Next” button.
After clicking next, you will see the Firebase required flutterfire_cli package. You can install this by running this command:
dart pub global activate flutterfire_cliIt will install the package globally in your machine. After flutterfire-cli installation you need to run this command from your project root directory:
flutterfire configure --<your_firebase_project_id>This command will fetch all your available project & ask you to configure your flutter app. Do all the steps.
After successfully configure your project you need to put this line of code inside your main() function:
WidgetsFlutterBinding.ensureInitialized();
await Firebase.initializeApp(
    options: DefaultFirebaseOptions.currentPlatform,
);
Now Firebase setup is done, we can go forward for next step.
Step-2:
Go to Authentication tab from your dashboard & click on Sign-in method. You will find a option called Google. Enable it & click save.
Now you need to add SHA-1 & SHA-256 key in your Firebase console. For getting SHA-1 & SHA-256 key, you can run this following commands from your android->app directory. It will create a new debug.keystore file for your project.
Generate debug.keystore file:
keytool -genkeypair -v -keystore debug.keystore -keyalg RSA -keysize 2048 -validity 10000 -alias debugNow you need to configure your android project for this newly generated debug.keystore file. For configure it, you need to create a new file called key.propertise & paste this following code in the file:
storePassword=<YOUR_STORE_PASSWORD>
keyPassword=<YOUR_KEY_STORE_PASSWORD>
keyAlias=debug
storeFile=debug.keystore
Now add this following code in your app lavel build.gradle file before starting android code block
def keystoreProperties = new Properties()
def keystorePropertiesFile = rootProject.file('key.properties')
if (keystorePropertiesFile.exists()) {
     keystoreProperties.load(new FileInputStream(keystorePropertiesFile))
}

android {
   //--------Your Android Code Block ----------- //
}
Now you need to configure your signinConfig:
signingConfigs {
        debug {
            keyAlias keystoreProperties['keyAlias']
            keyPassword keystoreProperties['keyPassword']
            storeFile file(keystoreProperties['storeFile'])
            storePassword keystoreProperties['storePassword']
        }
    }

    buildTypes {
   // ========== Your Build Type Code Block Goes Here ========== //
}
All is done for your android project.
Now you need to setup your Firebase with SHA-1 & SHA-256 Key
Getting SHA-1 Key
keytool -list -v -keystore debug.keystore -alias debugGetting SHA-256 Key
keytool -list -v -keystore debug.keystore -alias debug -storetype PKCS12 -keyalg RSA -keysize 2048 | openssl sha256 -binary | openssl base64Add those keys into your Firebase Project Settings:
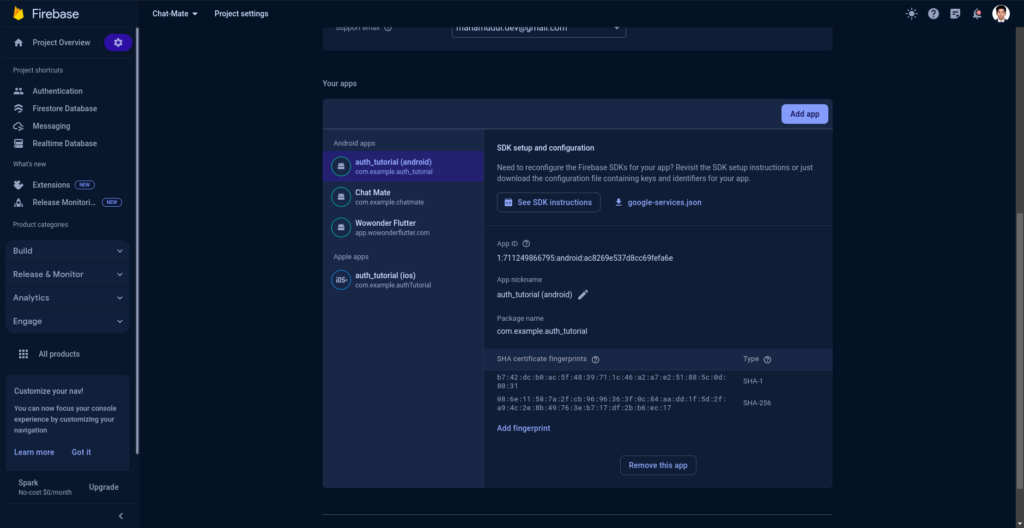
Step-3:
Go to Google Cloud Console dashboard & make sure your recently created project is selected in top left corner.
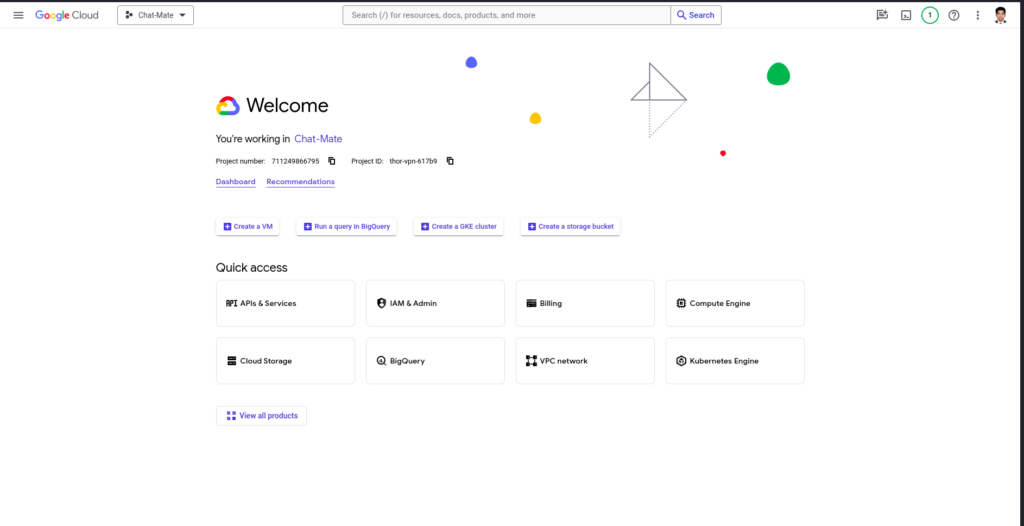
Click APIs & Services option. Then you can see a option in left side menu called “OAuth Consent Screen”. Click the menu and add a new app.
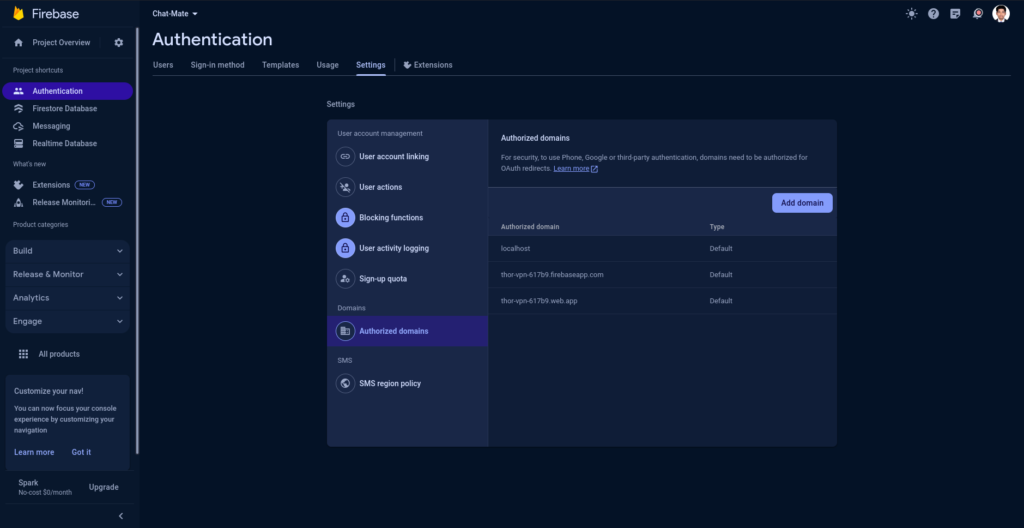
Now you need to fill-up some information about your app, You can fill-up as your own app information but make sure the “Authorized domain 1” need to fill-up with your Firebase project domain. You can find this domain from your project settings in Firebase
Step-4:
Now we need some actual coding for implement the Google login functionality. For this we need some required packages. We can install those packages by running this command:
flutter pub add firebase_core firebase_auth google_sign_inMake sure your project minimumSdk must be at least 21. You can verify this in app level build.gradle file
defaultConfig {
      minSdkVersion 21
}
Now write this following function for enabling Google Sign-in feature:
Future<User?> signInWithGoogle() async {
    try {
      final GoogleSignInAccount? googleSignInAccount =
          await GoogleSignIn().signIn();

      if (googleSignInAccount == null) {
        // User canceled the sign-in process
        debugPrint("User canceled the signin process.");
        return null;
      }

      final GoogleSignInAuthentication googleSignInAuthentication =
          await googleSignInAccount.authentication;
      final AuthCredential credential = GoogleAuthProvider.credential(
        accessToken: googleSignInAuthentication.accessToken,
      );

      final UserCredential authResult =
          await FirebaseAuth.instance.signInWithCredential(credential);
      debugPrint('User: ${authResult.user?.email}');
      return authResult.user;
    } catch (error) {
      debugPrint("Error signing in with Google: $error");
      return null;
    }
  }
Implement Faceboook Sign-in
Step-1:
Go to Facebook Developer Portal. Sign-in with your Facebook account. Then go to My Apps here you can see a create app button. Click the button for creating a new app.
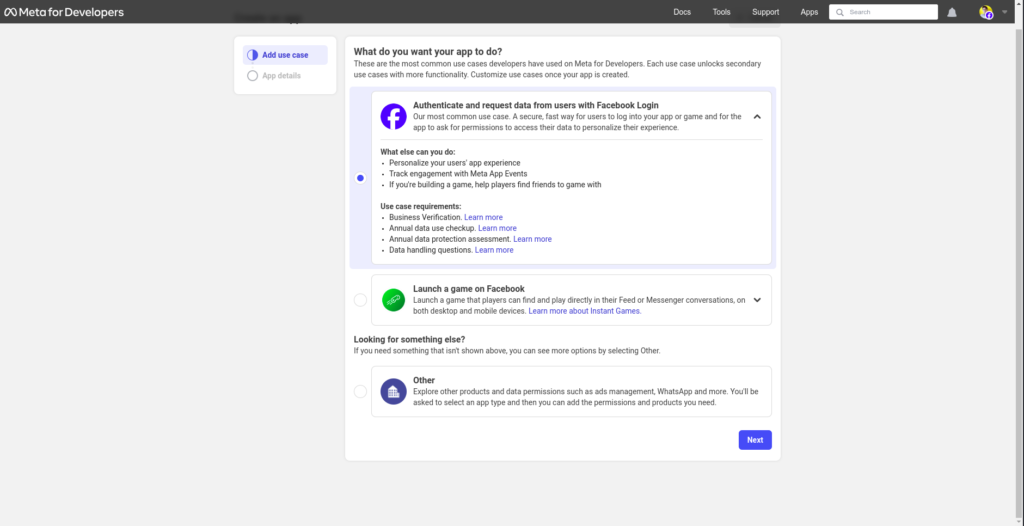
Select the first option “Authenticate and request data from users with Facebook Login” & click Next.
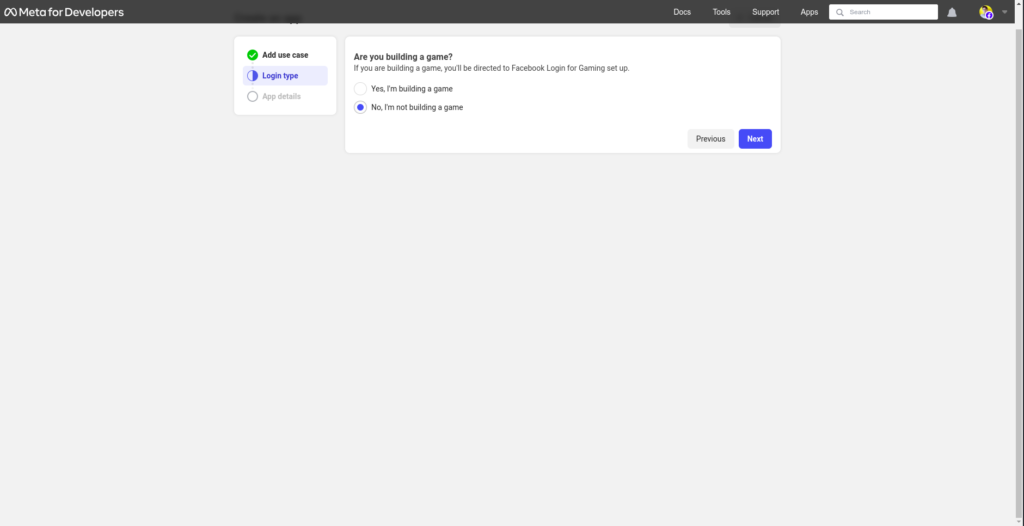
After clicking next it will ask you “Are you building game?”. In this tutorial we are making a android app. So we are selected “No, I am not building a game”. And then click Next.
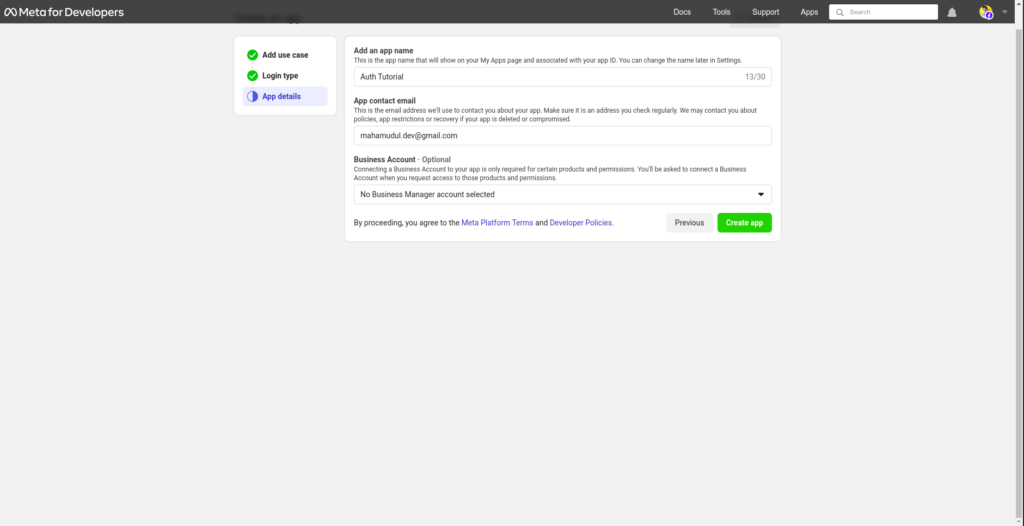
Now in this screen, type your app name, your app contact email address & optionally you can select any of your Facebook Business page.
After fill-up all the information click the “Create App” button. It will take few seconds to create a app. After app creation you can see your app dashboard.
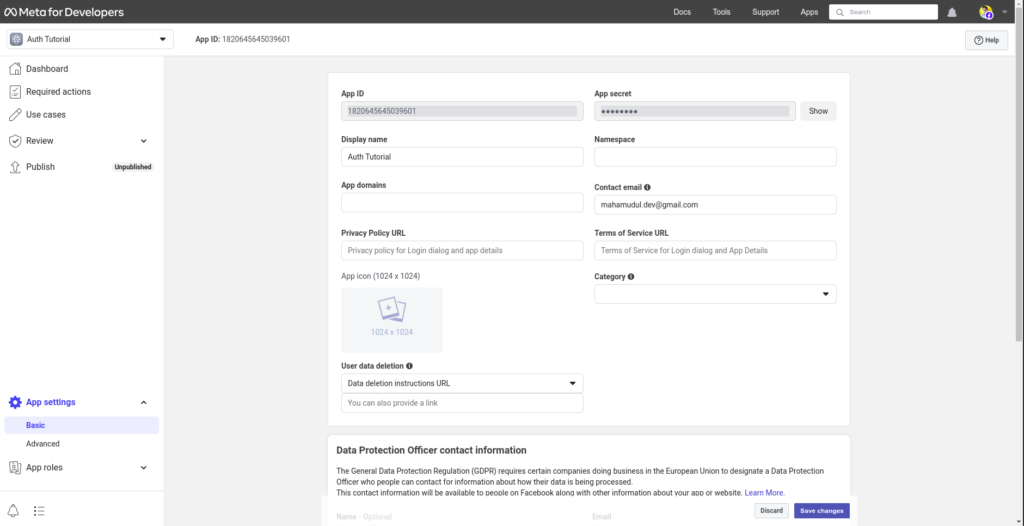
Copy the App ID & App Secret and add this in Firebase Facebook Auth configuration:
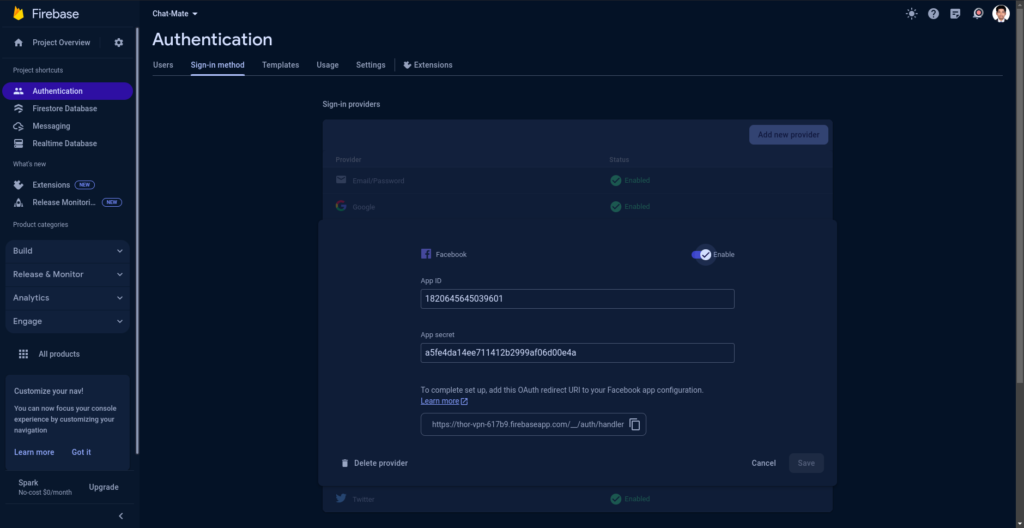
Copy the redirect URL in safe place, I need it some step later.
Now go back to Facebook Developer Portal & click App settings from bottom left corner, then fill-up all available fields & scroll-down. You can see the android option.
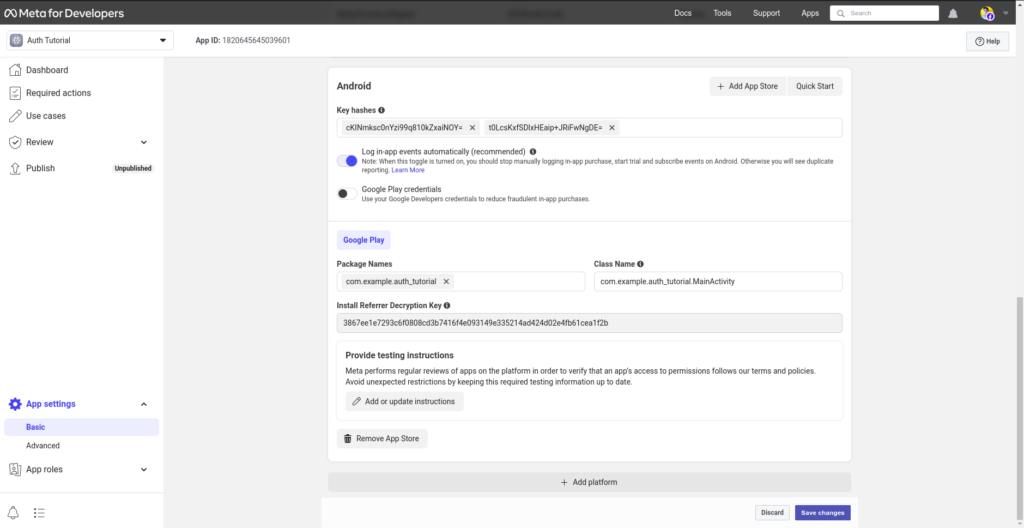
In this section you need to put your key hashes. You can generate Key Hashes for your app by this following command. Run this command from where your debug.keystore file located :
keytool -list -v -keystore debug.keystore -alias debug -storetype PKCS12 -keyalg RSA -keysize 2048 | openssl sha256 -binary | openssl base64You will get a Key Hash from this command. Copy the code and paste the command inside your Facebook Developer portal key hashes field.
Add package name and class name. Class name is mainly indicate your Android MainActivity. So, you can write your class name like this:
<your_package_name>.MainActivityClick the save button for saving your all changes.
Now go to Reviews menu & click App Review. You will see a button called “Request Permission For Features”
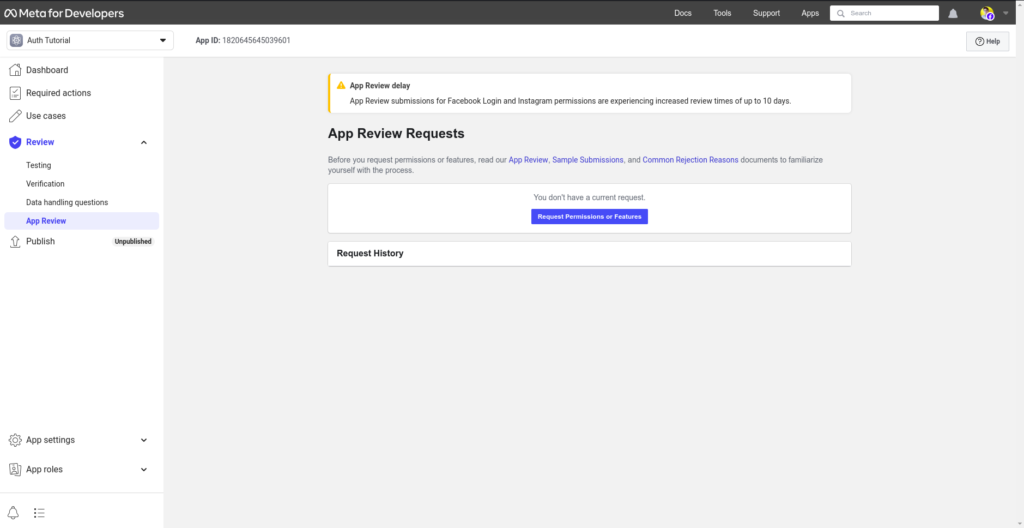
You will see a screen like this:
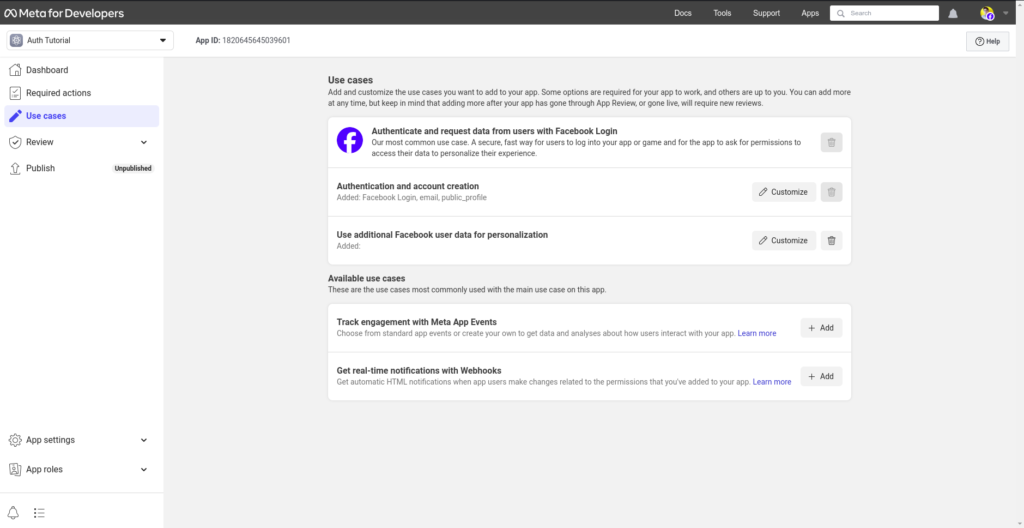
Click “Customize” from Authentication and account creation. And add email & public_profile from bottom as like this following screenshot
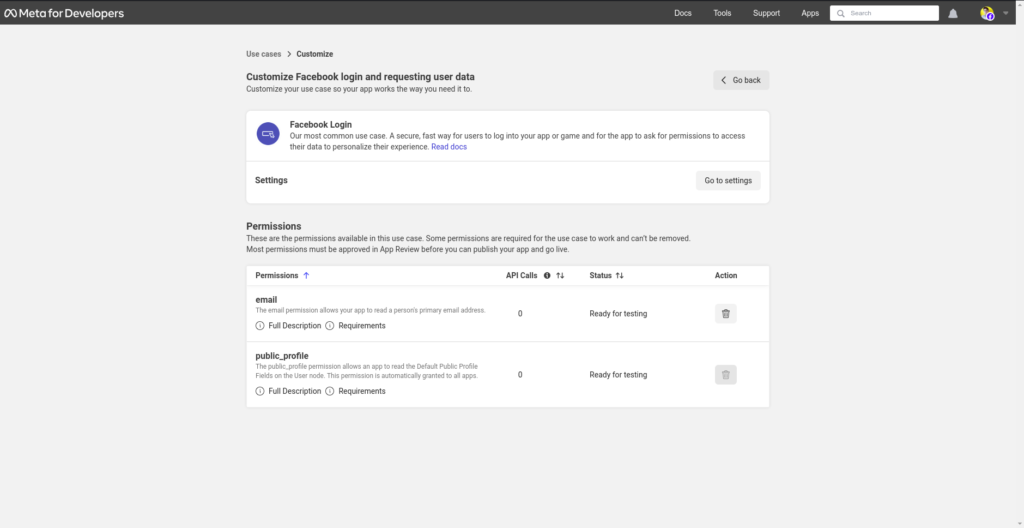
Now click “Go to Settings”
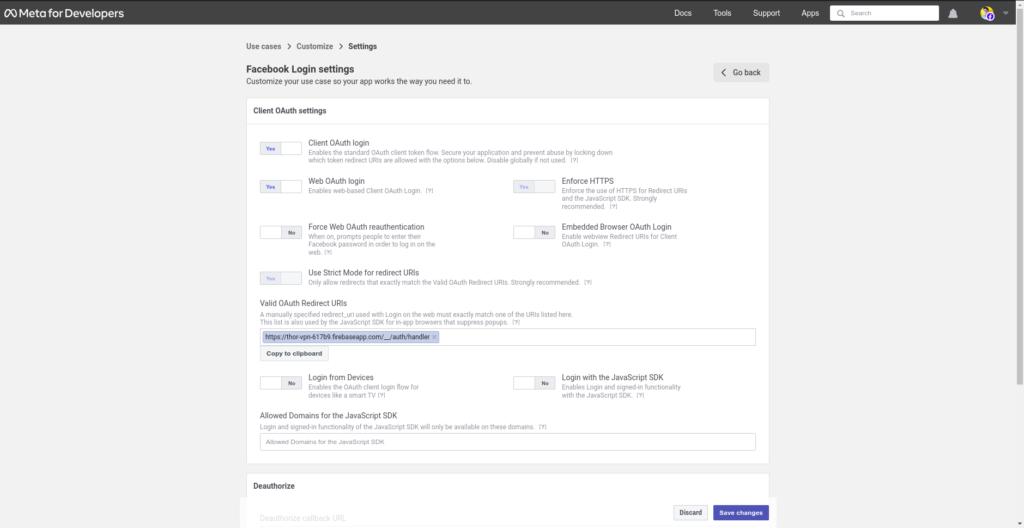
Make all switches as like this screenshot & paste redirect url which is we copied previously.
Now all configuration part is done.
Step-2:
Add this two dependency in your app level buil.gradle file:
dependencies {
    implementation 'com.facebook.android:facebook-login:latest.release'
    implementation 'com.android.support:multidex:2.0.1'
}
Add this following line in your defaultConfig block:
multiDexEnabled trueMake a strings.xml file (if not available) inside your values directory. The directory location should be
android->app->src->main->res->values->strings.xml
<?xml version="1.0" encoding="utf-8"?>
<resources>
    <string name="app_name">YOUR_APP_NAME</string>
    <string name="fb_login_protocol_scheme">fbYOUR_FACEBOOK_APP_ID</string>
    <string name="facebook_app_id">YOUR_FACEBOOK_APP_ID</string>
    <string name="facebook_client_token">YOUR_FACEBOOK_CLIENT_TOKEN</string>
</resources>
Add this permission in AndroidManifest.xml file:
<uses-permission android:name="android.permission.INTERNET"/>Add this two meta data inside <application></application> tag:
<meta-data android:name="com.facebook.sdk.ApplicationId" android:value="@string/facebook_app_id"/
<meta-data android:name="com.facebook.sdk.ClientToken" android:value="@string/facebook_client_token"/>
Add this Activity & meta data inside <application></application> tag:
<activity android:name="com.facebook.FacebookActivity"
        android:configChanges=
                "keyboard|keyboardHidden|screenLayout|screenSize|orientation"
        android:label="@string/app_name" />
    <activity
        android:name="com.facebook.CustomTabActivity"
        android:exported="true">
        <intent-filter>
            <action android:name="android.intent.action.VIEW" />
            <category android:name="android.intent.category.DEFAULT" />
            <category android:name="android.intent.category.BROWSABLE" />
            <data android:scheme="@string/fb_login_protocol_scheme" />
        </intent-filter>
    </activity>


        <!-- Don't delete the meta-data below.
             This is used by the Flutter tool to generate GeneratedPluginRegistrant.java -->
        <meta-data
            android:name="flutterEmbedding"
            android:value="2" />
Now add this two queries inside <menifest></menifest> tag:
<queries>
       <provider android:authorities="com.facebook.katana.provider.PlatformProvider" />
</queries>
<queries>
      <intent>
          <action android:name="android.intent.action.PROCESS_TEXT"/>
          <data android:mimeType="text/plain"/>
      </intent>
</queries>
Step-3:
Now add this function which is allow user’s to make a request for login with Facebook.
  Future<User?> signInWithFacebook() async {
    try {
      final result = await FacebookAuth.instance.login();
      if (result.status == LoginStatus.success) {
        final credential = FacebookAuthProvider.credential(result.accessToken!.token);
        final UserCredential authResult = await FirebaseAuth.instance.signInWithCredential(credential);
        debugPrint("Facebook login success: ${authResult.user?.displayName}");
        return authResult.user;
      } else {
        debugPrint("Facebook login failed: ${result.message}");
        return null;
      }
    } catch (error) {
      debugPrint("Error signing in with Facebook: $error");
      return null;
    }
  }
Congratulations! You successfully implemented Facebook authentication inside your Flutter app.
Stay with us for more tutorial articles.
Happy coding…


I go to see everyday some sites and information sites to red posts, except this web site gives quality bassed content.
Thanks for your valuable feedback. We will try create this type content regularly.
Hey there, I think your site might be having browser compatibility issues.
When I look at your blog in Ie, it looks fine but when opening in Internet Explorer, it has some overlapping.
I just wanted to give you a quick heads up! Other then that, superb blog!
Hello, yes this article is truly pleasant and I have
learned lot of things from it concerning blogging. thanks.
Thanks in favor of sharing such a pleasant idea,
piece of writing is nice, thats why i have read it
entirely
Hello to all, the contents existing at this site are truly amazing for people knowledge, well,
keep up the good work fellows.
Everything is very open with a very clear
explanation of the challenges. It was truly informative.
Your site is useful. Many thanks for sharing!
Hi there to all, how is all, I think every one is getting more
from this website, and your views are fastidious designed for new people.
Have you ever thought about including a little bit more than just
your articles? I mean, what you say is fundamental and
everything. Nevertheless think about if you added some
great pictures or videos to give your posts more, “pop”! Your content
is excellent but with pics and videos, this blog could certainly be one of the greatest in its field.
Wonderful blog!
Heya i’m for the first time here. I found this board and
I find It truly useful & it helped me out a lot. I hope to give something back and help others like you
aided me.
you are really a good webmaster. The web site loading pace
is amazing. It kind of feels that you’re doing any unique
trick. Also, The contents are masterwork.
you’ve done a wonderful activity in this matter!
It’s fantastic that you are getting thoughts from
this post as well as from our dialogue made at this time.
What’s up, of course this article is genuinely good and I
have learned lot of things from it on the topic of blogging.
thanks.
Do you have any video of that? I’d care to find out
some additional information.